First you need to enable Swipe card access on your FMTDATA website, setup an ISO/ACCESS number and the columns you require.
This is the process:
1) Log in and go to the Admin area – https://fmtdata.com/Admin
2) Select General – https://fmtdata.com/Admin-General
3) Enable swipe cards.
4) Go to Iso/Access – https://fmtdata.com/Admin-ISO_Access
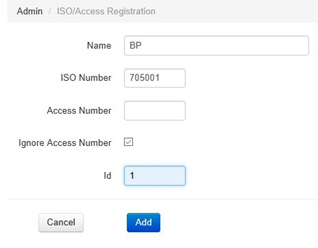
5) Click the Add button and fill in the details:
ISO access numbers can be obtained from the card Number as follows
For a BP card eg: 7050 16015319 00019 the ISO/Access number would be 705001 as the space needs to be filled in with a Zero.
For a Caltex card eg: 7071340077445566 the ISO/Access number would be 707134
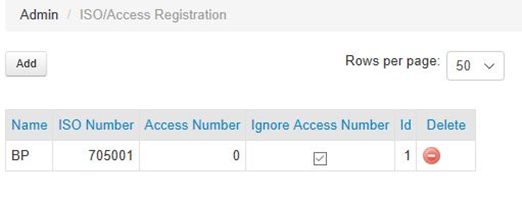
Once you click add you will see the new ISO/Access registration on the website as below.
6) Go to Vehicles page and add all the required columns to ensure that the card file can be imported with as much detail retained as possible into the SmartFill system.
The final columns included in the CSV will be determined by what columns the customer has set up on their vehicles page. You can leave extra columns in the CSV file – they will be ignored by the website if not allocated to an existing column when importing the file.
1) The raw BP file format (.xls).

2) Manipulated the original to extract the actual card number (spaces replaced with zeros) and to allocate an ISO/ACCESS number to that card type (still .xls).

Example of extracted ISO and card number, all spaces replaced with a zero:
7050 16015319 00019
ISO: 705001
Card Number: 6015319000019
In Excel use this equation to extract automatically if a large number of cards are being added.
=RIGHT(A2,LEN(A2)-7+1)
Spaces can be easily replaced by copying the end result of the above equation into a new cell – then selecting only that column, do a find and replace, to replace any spaces with a zero
3) Convert the xls file to reflect these columns and other basic requirements
– Y=1, N=0 for enabled columns and add enable columns if needed.
– Split the ISO and Card Numbers from the Full card number EXCEL equation used =RIGHT(A2,LEN(A2)-7+1)
– Convert the expiry date to YYMM only.
– Remove the word Litres from the daily volume allocation
– See attached file.
4) The final CSV with extra columns removed (not required – but easier to understand as an example)

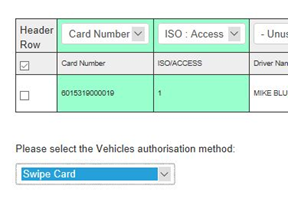
This last file can then be imported into your website and relevant columns assigned via the dropdown box’s. And at the base – swipe card must be selected as a type.
5) Press the import button on the vehicles page – Select the newly created CSV file.
6) Assign the top row as a header row – assign each column, select import type as swipe cards – IMPORT.
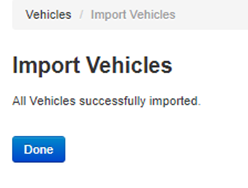
7) Go to the vehicles page and ensure all is as expected.
Caltex card
7071340077445566 becomes ISO Access 707134 and card Number 77445566
BP Card
7050 16015319 00019 becomes ISO Access 705001 and card Number 6015319000019